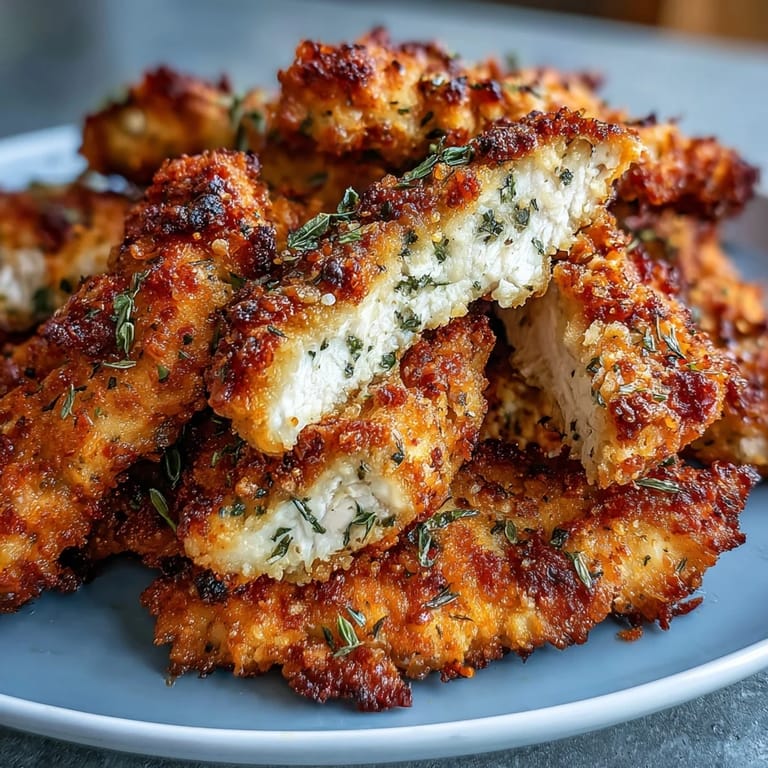
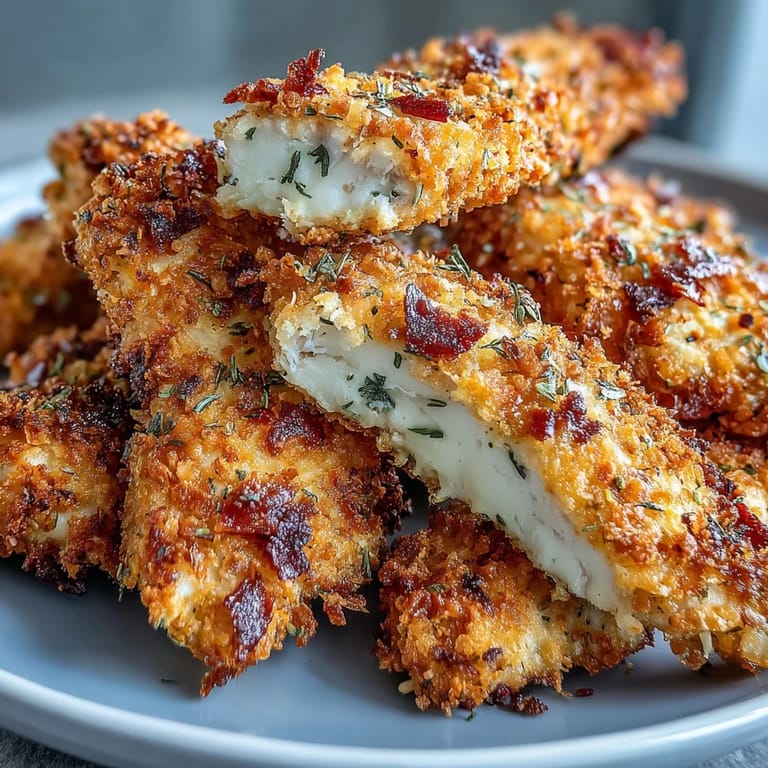
 Save
Save My kitchen got quieter when I invested in an air fryer, which sounds odd until you realize I stopped obsessing over deep frying and its splatter aftermath. The first batch of chicken strips I made came out golden and impossibly crispy, yet when I bit into one, the center was still juicy and tender. My partner grabbed three before I could plate them properly, and that's when I knew this method was going to become our weeknight salvation. There's something almost magical about how little oil you need to achieve that restaurant-quality crunch we all crave.
I made these for my nephew's school lunch phase when he decided chicken nuggets were beneath him but would accept homemade strips. Watching him carefully arrange them in his lunchbox with the same pride I felt serving them reminded me that food made at home carries a different weight, even in a plastic container. He's still asking for them years later, which has to count for something.
Ingredients
- Chicken breasts, cut into strips: Start with boneless, skinless pieces because they cook evenly and keep the meal lean; pat them completely dry before breading or you'll end up with soggy patches instead of that satisfying crunch.
- Whole wheat breadcrumbs: They add a subtle nutty flavor and hold onto seasonings better than their white counterparts, though panko will give you extra crispness if that's your priority.
- Grated Parmesan cheese: Don't skip this; it creates little crispy pockets of flavor throughout and adds enough salt that you might reduce other seasoning slightly.
- Paprika, garlic powder, onion powder: These three create a baseline savory profile that feels homemade rather than processed, and they toast slightly in the air fryer heat for extra depth.
- Eggs and low-fat milk: This mixture acts as your adhesive, helping the breading cling instead of flaking off halfway through cooking.
- Olive oil spray: The secret weapon that delivers the crunch you want without a deep fryer's oil bath; two light sprays per side makes all the difference.
Tired of Takeout? 🥡
Get 10 meals you can make faster than delivery arrives. Seriously.
One email. No spam. Unsubscribe anytime.
Instructions
- Heat your air fryer:
- Set it to 200°C (400°F) and let it preheat for exactly three minutes while you prep everything else. This small step ensures the first batch crisps immediately instead of steaming.
- Dry your chicken thoroughly:
- Use paper towels to remove every bit of surface moisture, which is the difference between crispy and clammy. This is not a step to rush through.
- Create your breading station:
- One shallow bowl with the egg mixture, another with your breadcrumb blend mixed together. Having everything ready means you're not fumbling mid-dip.
- Coat each strip with intention:
- Dip into egg first, let excess drip off, then press gently into the breadcrumb mixture, turning to coat both sides. You want an even layer that sticks, not chunks falling off.
- Arrange in your basket:
- Place strips in a single layer without crowding; they need air to circulate around them for even crisping. If your basket is small, work in batches rather than stacking.
- Apply a light oil spray:
- This is crucial and easy to overdo. Give each strip two quick sprays on each side, just enough to catch the light. More oil doesn't equal more crunch; it just creates greasiness.
- Cook with a halfway turn:
- At the six-minute mark, gently flip each strip using tongs to ensure golden color on both sides. The internal temperature should hit 75°C (165°F) when you check with a thermometer.
- Rest and serve immediately:
- They're best eaten within minutes while the outside is still crispy and the inside retains its steam-heated warmth. Any dipping sauce becomes your partner in this moment.
 Save
Save There was an evening when I made these strips and forgot to mention them to my roommate, who wandered into the kitchen as they finished cooking. The aroma alone made her stop mid-conversation, and within seconds we were tasting them together with nothing but hot sauce and genuine surprise that something so simple could taste this satisfying. That's when food becomes less about nutrition and more about the small joy of discovering something delicious.
Why the Air Fryer Method Works
Traditional frying demands oil temperature monitoring, thermometer watches, and cleanup that takes longer than cooking itself. The air fryer uses superheated circulating air to crisp the exterior while moisture inside stays trapped, creating contrast without the oil bath. It's not a magic trick, just physics working in your favor, and it means you can make restaurant-quality chicken strips without the restaurant-sized mess or guilt.
Building Your Seasoning Flavor
The Parmesan and paprika combination shouldn't be underestimated; they work together to create a savory depth that makes these strips taste like someone spent hours developing the recipe. Garlic and onion powders add background notes without sharpness, and if you taste the raw breading mixture, it should make you pause and think, yes, this is going somewhere good. Start here and make it your baseline, then experiment with additions once you've established what you love about the foundation.
Serving and Pairing Ideas
These strips work equally well as a quick dinner centerpiece or as part of something larger like a grain bowl with roasted vegetables and tahini dressing. I've served them cold in lunchboxes, warm with fresh salad, alongside sweet potato fries, and even over greens with ranch. Think of them as a blank canvas that accepts whatever context you place them into rather than demanding a single presentation.
- Pair with spicy mayo, garlic aioli, or classic barbecue sauce depending on your mood and what's already in your fridge.
- For a complete meal in one plate, serve with roasted vegetables and a grain like quinoa or brown rice.
- Leftover strips reheat perfectly in the air fryer at 180°C (350°F) for about four minutes, restoring most of the original crispness.
 Save
Save Making chicken strips at home means you control every ingredient and never wonder what went into that mysterious coating. It's nourishing, quick, and tastes better than delivery or frozen alternatives ever could.
Kitchen Help
- → How do I prevent the chicken strips from being dry?
Pat the chicken dry before coating and avoid overcooking. Use a meat thermometer to ensure the internal temperature reaches exactly 75°C (165°F). The egg wash helps lock in moisture while creating a barrier between the meat and the crispy coating.
- → Can I make these chicken strips ahead of time?
Yes, you can bread the chicken strips up to 4 hours in advance and refrigerate them uncovered. This actually helps the coating adhere better. Cook them fresh when ready to serve for the best texture and crispiness.
- → What dipping sauces pair well with these chicken strips?
Classic options include honey mustard, ranch dressing, barbecue sauce, or buffalo sauce. For healthier alternatives, try Greek yogurt-based sauces, marinara, or a spicy sriracha mayo.
- → Can I use chicken thighs instead of breasts?
Absolutely! Boneless, skinless chicken thighs work wonderfully and tend to be more forgiving with cooking time. They may need an extra 1-2 minutes in the air fryer due to slightly higher fat content, but they'll be incredibly juicy.
- → How do I store and reheat leftover chicken strips?
Store cooled chicken strips in an airtight container in the refrigerator for up to 3 days. Reheat in the air fryer at 180°C (350°F) for 3-5 minutes to restore crispiness. Avoid microwaving as it makes the coating soggy.
- → Can I freeze these chicken strips?
Yes, freeze cooked and cooled chicken strips in a single layer on a baking sheet, then transfer to a freezer bag for up to 2 months. Reheat from frozen in the air fryer at 180°C for 8-10 minutes, turning halfway through.